The CrispKuts Field Notes

Tips & techniques
for every spread,
every slice.

Small rituals, big difference. A living guide to getting the most out of every CrispKuts tool — written for the kitchen counter, not the manual drawer.

Chapter 01

Soft butter, every morning.

A water-seal keeper is simple — but a few small habits keep your butter perfectly spreadable for weeks.

  1. Make sure the lid is completely dry before packing butter — moisture causes slipping. Use slightly cool room-temperature butter and pack up to 117 g firmly into the cup.

  2. Pour cold filtered water up to the indicated line in the jar. Insert the butter-filled lid — the water forms an airtight seal that keeps butter fresh without refrigeration.

  3. Lift the lid, spread, return. Butter is hydrophobic, so it won't mix with water if it touches. Keep a paper towel nearby to catch drips when lifting.

  4. Refresh the water every 3 days to keep butter tasting clean. Use the included pendant with a glass marker or sticker as a reminder for your last refill.

Chapter 02

German steel. Built to last.

The Sourdough Bread Knife Kit is built around an 8" German 1.4116 high-carbon stainless blade with a full-tang G10 handle — the same alloy used in premium European chef knives.

  1. The 8" blade is forged from German 1.4116 high-carbon stainless steel. It holds a serrated edge for years and resists staining. The full-tang G10 handle is triple-riveted, balanced for long pulls, and grippy even with wet hands.

  2. Serrated edges should never go through a pull-through sharpener. See Chapter 05 for the rod technique that works for this knife.

Chapter 03

Score for the perfect ear.

The included precision aluminum bread lame ships with 5 replaceable scoring blades — everything you need to give every loaf a baker's signature.

  1. Use the included aluminum bread lame to score your loaves just before baking — a confident 0.5 cm deep slash at a shallow angle gives the best ear. Swap blades when scoring starts to drag.

    Score with the lame

Chapter 04

Even slices, every loaf.

The Adjustable Bread Slicer Set pairs a stainless serrated bread knife with a foldable thickness guide — the easiest way to get uniform slices at home.

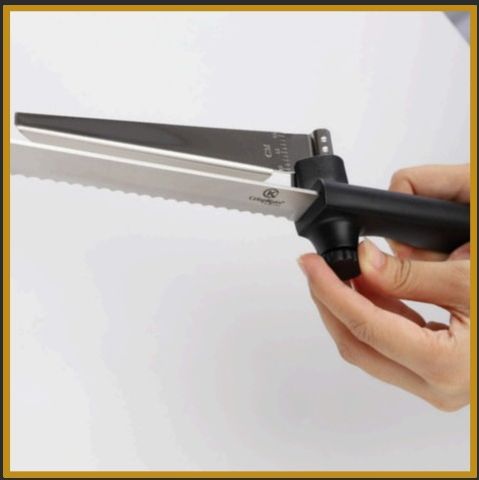
  1. Slide the adjustment guide onto the knife at your desired slice-thickness mark. Use it for sandwich loaves, sourdough boules, and baguettes alike.

    Attach the guide
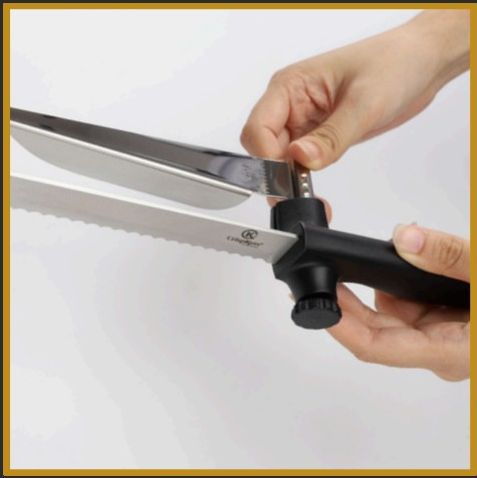
  2. Turn the knob clockwise to lock the guide. Counter-clockwise loosens it so you can re-adjust. Start at ~12–15 mm (medium) and tune from there.

    Set thickness
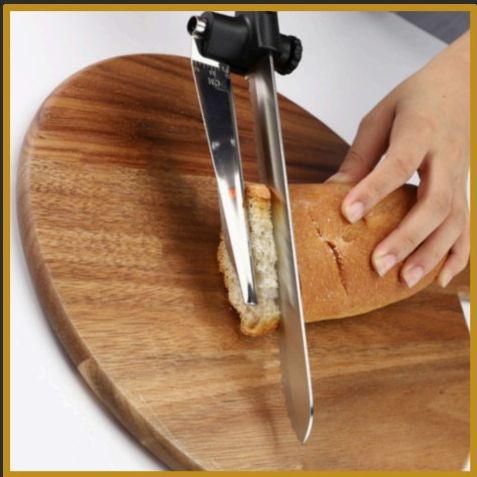
  3. Place the loaf on a wooden board. Use long, gentle back-and-forth strokes — never press straight down. Let the serrations do the work; the German steel keeps its bite for hundreds of loaves.

    Long sawing strokes
  4. If a loaf is very fresh, let it cool fully or chill for 10–15 minutes before slicing. Minimal downward force — let the serrations do the work.

  5. For chopping motions, remove the slicing guide and use the bread knife alone. The guide is built for drawing strokes, not downward chops.

Chapter 05

Sharpening — use a rod.

Both CrispKuts serrated bread knives — the one in the Sourdough Bread Knife Kit and the one in the Adjustable Bread Slicer Set — should be sharpened the same way: with a tapered ceramic or diamond sharpening rod.

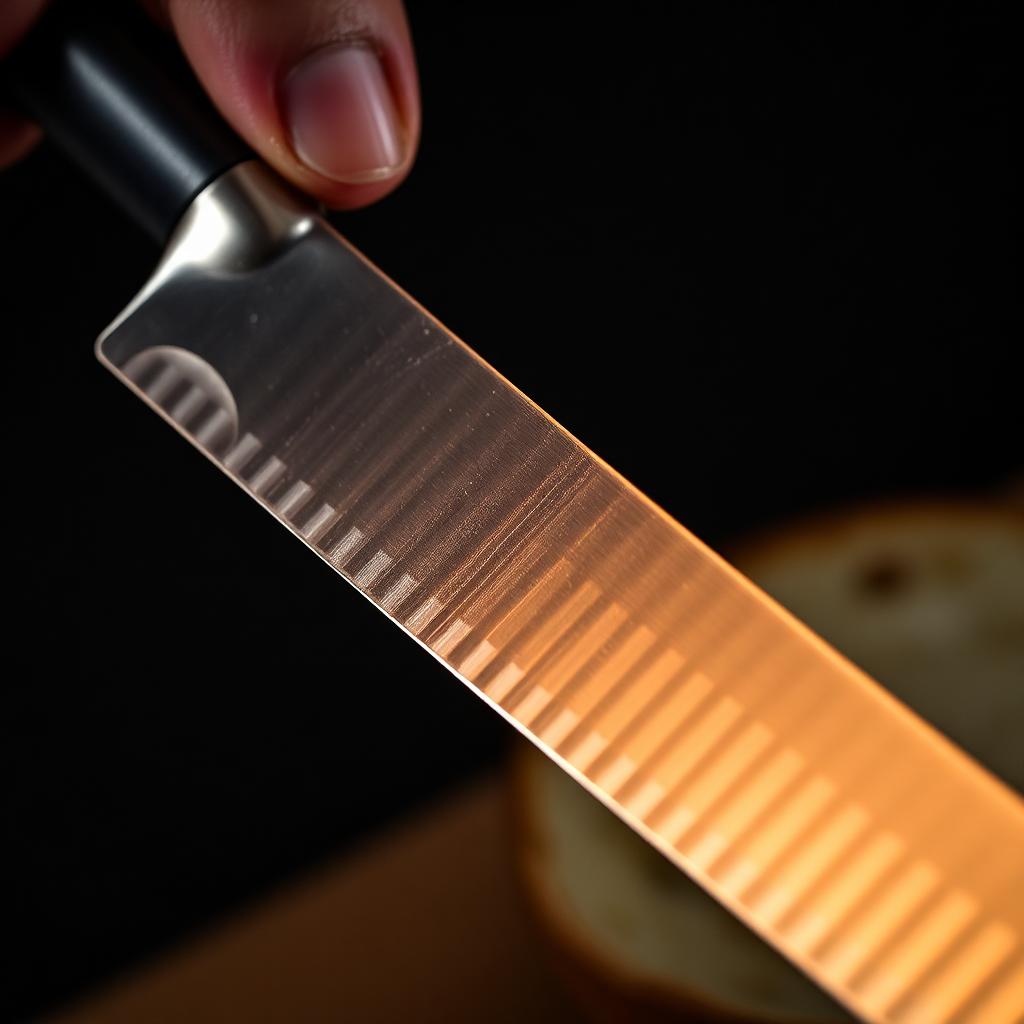
  1. A pull-through sharpener flattens and chips the teeth of a serrated edge. A tapered rod restores each gullet (the curved notch) individually without damaging the scallops.

    Why a rod, never a pull-through
  2. Match the rod's taper to each gullet, hold the original bevel angle (~15–20°), and draw the rod from heel to tip with light pressure — 2–3 passes per gullet, on the beveled side only. Finish with one light pass on the flat side to remove the burr.

  3. Once or twice a year is plenty for home bakers. If slicing starts to tear the crust instead of cutting it, it's time.

Chapter 06

For your other kitchen knives.

The compact 2-stage sharpener included in the kits is a bonus tool for your straight-edge knives. Do NOT use it on the serrated bread knives.

  1. Use the 2-stage sharpener on chef, paring, utility, and santoku knives — anything with a straight, non-serrated edge. For the serrated bread knives, see Chapter 05.

  2. Place the sharpener on a flat surface and hold the base firmly. Draw the blade through the coarse slot 3–5 times to reshape the edge, then finish in the fine slot with 3–5 light pulls to polish.

  3. A few pulls every couple of weeks keeps everyday knives keen. If a blade is deeply chipped, take it to a professional sharpener instead.

Chapter 07

Made to last. Cared for to last longer.

A little ritual extends the life of every CrispKuts tool — and keeps results consistent.

  1. Let blades and ceramic pieces air dry fully before storage. Trapped moisture dulls steel and loosens grip on handles.

  2. While our ceramics are dishwasher safe, hand-wash the German steel bread knife and sharpener with warm soapy water and dry immediately. Dishwashers are hard on high-carbon steel.

Want the tool?

Build your kitchen, one ritual at a time.

Shop the storefront